NEW and Under Contruction! - Build a fully featured Arduino Thermostat/Temperature
Monitor
A while ago i decided to build my own Temperature Monitor which I tweaked to suite my needs. In this post I will attempt to describe the steps I took to build the arduino based temperature monitor. The end result will be a Arduino Thermostat which I will use in a DIY Parrot Incubator.
What is Arduino?
An open-source prototyping platform … for all you ever need to know on Arduino, check out the Arduino website. The version of the platform used here has an Atmel ATmega328 microcontroller.
The goal of the project
1. To remotely acquire and deliver temperature data measured and displayed on a LCD screen.
2. To send out a warning if temperature readings drop below or above a set temperature.
3. To build a reliable temperature measuring device.
4. To be relatively low up front cost, after looking at commercial thermostat units. I had some parts lying around and I ended up deciding to base the project on the Arduino seeing that I already had an Arduino Uno board that was gathering dust.
5. To be fairly easy to construct without having design my own PCB's.
Thus, I based the project on the Arduino Uno.
Parts Required
1 x Arduino Uno board

1 x LM35 Temperature Sensor or equivalent

1 x Sparkfun Screwshield for Arduino

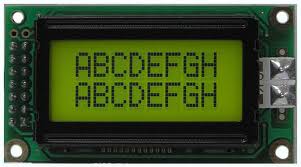
1 x 8 x 2 LCD Monitor ( I used a Topway LMB0820C)
Following to be ordered:
1 x Project Box (for housing the Arduino, LCD and cabling)
1 x 5 volt power source to power the Arduino Uno
1 x Buzzer
1 x Connecting Wire
Solder
More about the LM35 Temperature Sensor
The LM35 series are precision integrated-circuit temperature sensors, whose output voltage is linearly proportional to the Celsius (Centigrade) temperature. The LM35 thus has an advantage over linear temperature sensors calibrated in ° Kelvin, as the user is not required to subtract a large constant voltage from its output to obtain convenient Centigrade scaling. The LM35 does not require any external calibration or trimming to provide typical accuracies of ±¼°C at room temperature and ±¾°C over a full -55 to +150°C temperature range. Low cost is assured by trimming and calibration at the wafer level. The LM35's low output impedance, linear output, and precise inherent calibration make interfacing to readout or control circuitry especially easy. It can be used with single power supplies, or with plus and minus supplies. As it draws only 60 µA from its supply, it has very low self-heating, less than 0.1°C in still air. The LM35 is rated to operate over a -55° to +150°C temperature range, while the LM35C is rated for a -40° to +110°C range (-10° with improved accuracy). The LM35 series is available packaged in hermetic TO-46 transistor packages, while the LM35C, LM35CA, and LM35D are also available in the plastic TO-92 transistor package. The LM35D is also available in an 8-lead surface mount small outline package and a plastic TO-220 package.
Herewith two images of my prototype Arduino Thermostat/Temperature Sensor Project:


I will try to put a video together that will hopefully provide more info and detail on how this thermostat/temperature sensor works. Stay tuned!
Here is Part 1 - 5 of a series of videos that provide more info on how the thermostat/temperature sensor works.
TO BE UPDATED.......
Under Construction! - I designed this page especially for those who like DIY Projects. Hopefully you will find an interesting project here that you will be able to build/construct and in the process you will hopefully learn more about the fascinating world of weather and disasters. It’s also a wonderful educational page for teachers, parents and students to kindle the interest in weather and disaster projects. If you have any interesting weather or disaster project that you would like to share with others, please send the information to Mossel Bay Weather 2013 by clicking HERE.